In the previous tutorial, we discussed the basics of the I2C protocol. In most of the embedded devices, either UART otherwise I2C is used for console messages. In this tutorial, we will discuss serial communication in Raspberry Pi using the I2C protocol.
I2C in Raspberry Pi
For serial communication over the I2C protocol, the Broadcom processor of Raspberry Pi has Broadcom Serial Controller (BSC). This standard-mode master BSC controller is NXP Semiconductor’s I2C compliant and supports a data transfer rate of 400 kbps. The BSC controller supports both 7-bit as well as 10-bit addressing. This I2C interface is accessible at pins GPIO2 (Board Pin No. 3) and GPIO3 (Board Pin No. 5). GPIO2 is Serial Data (SDA) line, and GPIO3 is a Serial Clock (SCL) line of the I2C1. These I2C pins are internally pulled up to 3.3V via 1.8 kohms resistors. That is why these pins cannot be used for general-purpose I/O where pull-up is not required.
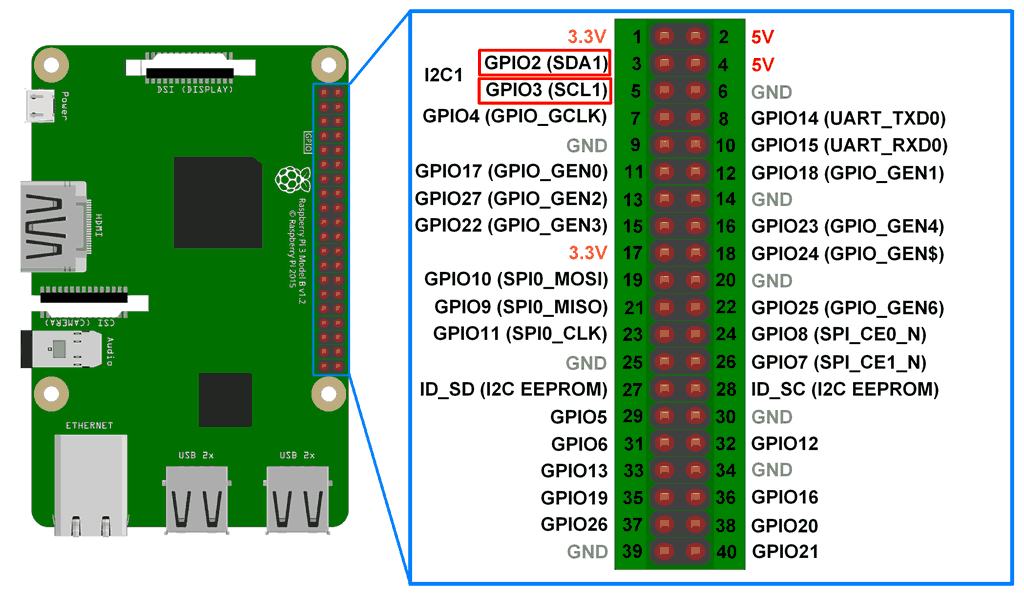
There is one more I2C peripheral BSC2 in Raspberry Pi identified as I2C0. The BSC2 master is dedicated to the HDMI interface and cannot be accessed by users. This I2C interface is present at board pins 27 (ID_SD) and 28 (ID_SC). I2C0 remains reserved for reading EEPROM of Raspberry Pi’s add-on boards called Hardware on The Top (HAT) boards. I2C0 can only talk to HAT EEPROM at address 0x50 during boot time.
It is possible to access I2C0 only if both the camera interface and HDMI port are unused. To use I2C0, add the following lines to boot/config.txt.
dtparam=i2c_vc=on
The I2C0 pins are not internally pulled up, so if they are used by modifying the Raspberry Pi configuration file, external pull-ups (to 3.3V) must be used on both SDA and SCL lines. While using I2C0, pins avoid using the HAT EEPROM address.
Even the I2C1 is disabled on Raspberry Pi by default. It needs to be enabled from the Raspberry Pi configuration. The Raspberry Pi’s BSC controllers support multi-master, multi-slave I2C. Therefore, I2C1 is sufficient to connect several I2C slaves (maximum 112 slaves) and any number of master devices.
Enabling I2C1 from Raspberry Pi GUI
On Raspbian, navigate to Pi Start Menu -> Preferences -> Raspberry Pi Configuration.

In the pop-up window, click on the ‘Interfaces’ tab and select the ‘Enable’ radio button for I2C. You can also enable or disable other interfaces as required.
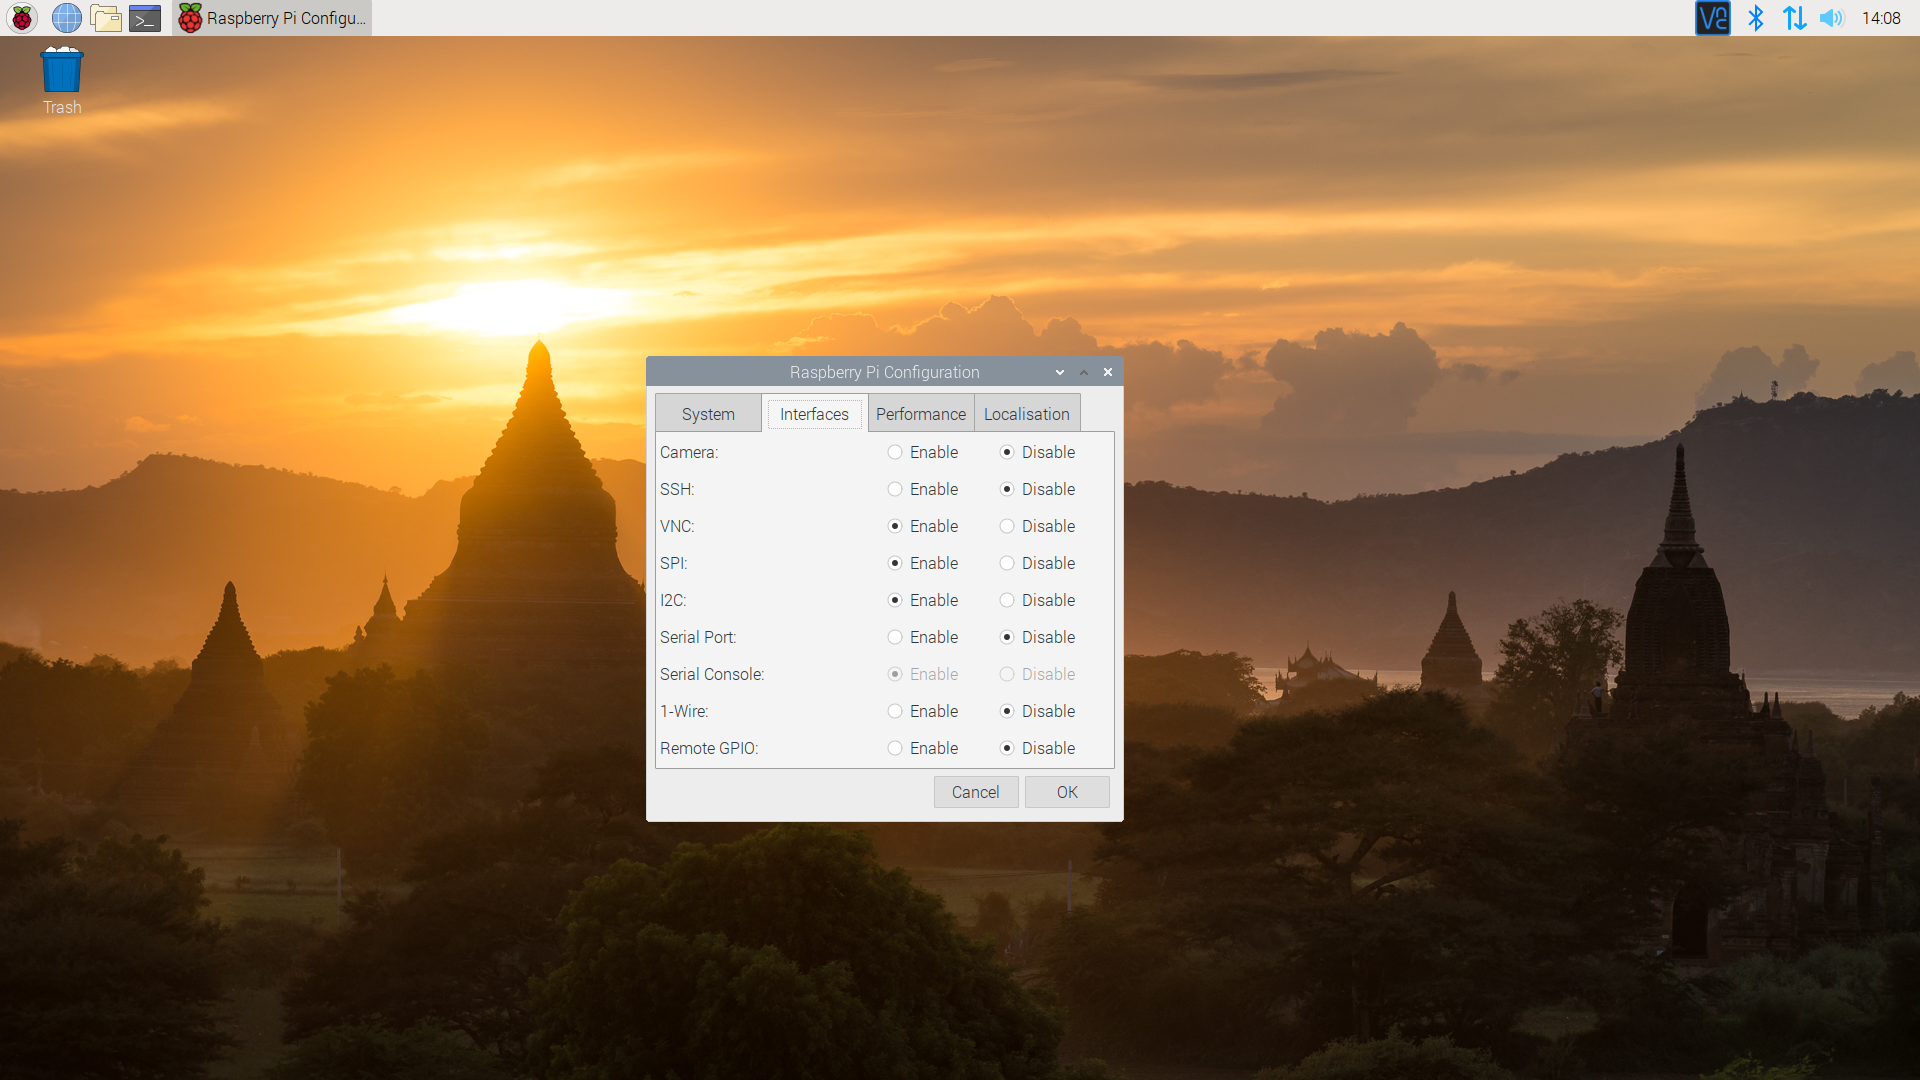
To take changes effect, restart Raspberry Pi. After rebooting, GPIO3 and GPIO5 can be used to connect Raspberry Pi as I2C master with an I2C bus or to any I2C slave.
Enabling I2C1 from Terminal
The I2C support for Raspberry Pi’s ARM core and Linux Kernel can also be enabled from the Terminal (Bash Shell on Raspberry Pi). Open Terminal and run the following command:
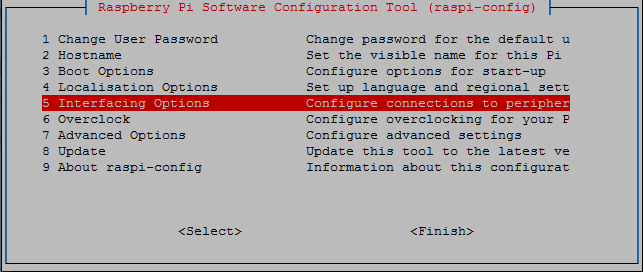
sudo raspi-config
In the Raspberry Pi Software Configuration Tool, navigate to ‘Interfacing Options’.
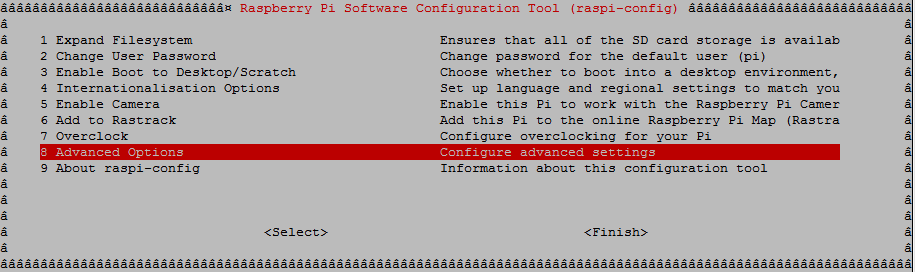
In older Raspberry Pi models, navigate to ‘Advanced Options’ and then ‘I2C’.
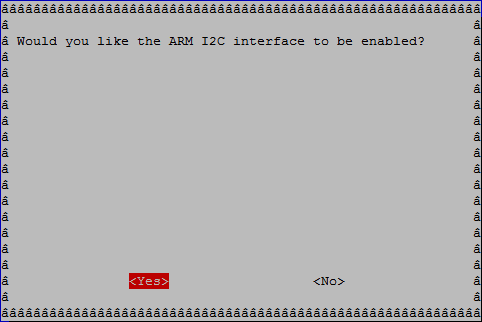
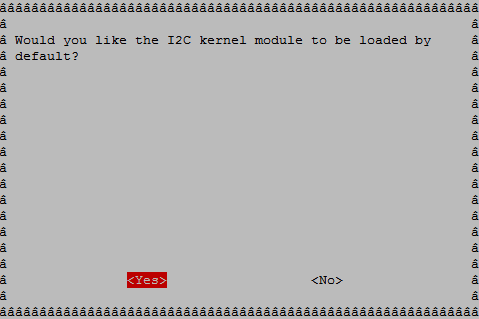
 In the pop-up window, enable the Arm I2C interface and select ‘Yes’ to load the I2C Kernel Module.
 Now reboot Raspberry Pi by entering the following command:
sudo reboot
After rebooting, GPIO3 and GPIO5 can be used to connect Raspberry Pi as I2C master with an I2C bus or to any I2C slave.
Testing I2C port
After enabling I2C user-port and rebooting Raspberry Pi, we can test if the port is available as a Linux device or not. In the Terminal window, run the following command:
ls /dev/
Or
ls /dev/*i2c*
I2C1 must appear as one of the Linux devices available as shown in the image below.
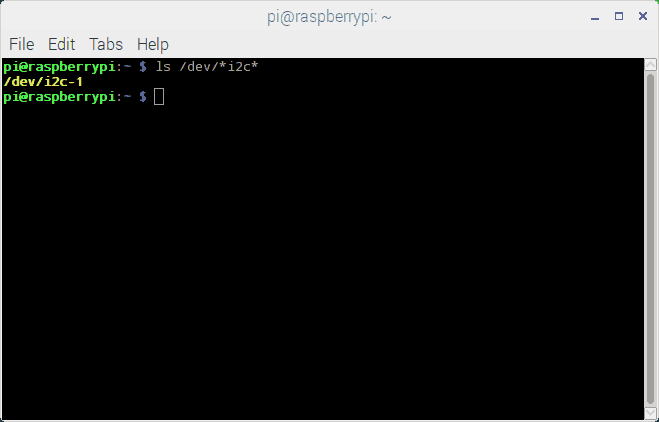
Note that in the older versions of Raspberry Pi, the I2C user port is identified as I2C0 instead of I2C1. In all 256M Raspberry Pi models, the I2C user port is 0, and in rest, all it is 1.
Scanning I2C slaves on Raspberry Pi
After enabling the I2C user port, the connected I2C slaves can be detected using i2c-tools. First of all, install the i2c-tools by running the following command in the Raspberry Pi Terminal:
sudo apt-get install -y i2c-tools
Now run the following command to scan connected I2C slaves:
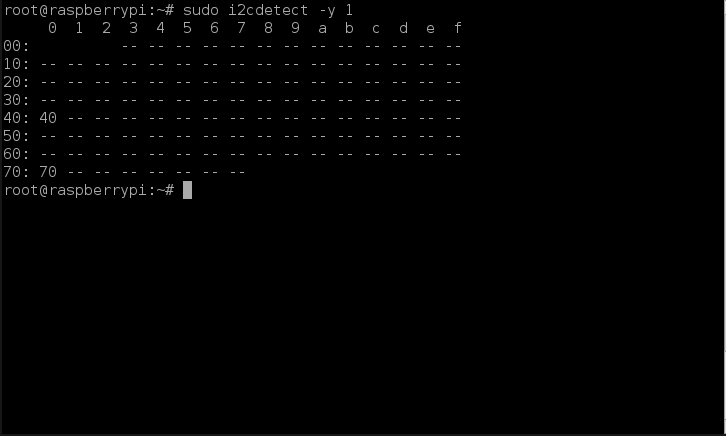
sudo i2cdetect -y 1
As already mentioned that in older versions of Raspberry Pi, I2C user port is 0, in older versions change the port number to 0 as follows:
sudo i2cdetect -y 0
The i2c-detect is a tool that scans the I2C user port and returns the I2C addresses of the connected slave devices. The tool returns a table of addresses of connected I2C slave devices as shown in the image below:
 Accessing I2C devices using SMBus library
On Raspberry Pi, the I2C bus can be accessed in a Python script using the SMBus library. SMBus is a subset of the I2C interface. The Python library for SMBus can be used to communicate with I2C based devices. The SMBus library can be installed on Raspberry Pi by running the following command:
sudo apt-get install python-smbus
In a Python script, the SMBus library can be imported using the following statement:
import smbus
After importing SMBus library, an object of SMBus class must be created using the SMBus() method. The SMBus() method takes the I2C port number as a parameter and must be used in an assignment statement to create an SMBus object. It has the following syntax:
<Object_name> = smbus.SMBus(I2C_Port_Number)
The following is a valid example of creating an SMBus object:
i2c-bus = smbus.SMBus(1)
Note that in older Raspberry Pi versions, I2C user port is 0, and in all Raspberry Pi versions above 256M RPi versions, it is 1. To use the latest SMBus2 library, it can be installed using pip by running the following command:
pip install smbus2
In a Python script, the SMBus2 library can be imported using the following statement:
from smbus2 import SMBus, i2c_msg
An object of SMBus class can be created using smbus2.SMBus() method as follows:
i2c-bus = smbus2.SMBus(1)
The smBus2 library has two classes – SMBus and i2c_msg. The SMBus class supports the following methods:
smbus.SMBus()/smbus2.SMBus() – To create an SMBus object in Python script.
open(bus) – To open a given i2c bus.
close() – To close I2C connection.
The serial data from an I2C slave can be read in bytes, words or block of bytes. In some I2C slave devices, master need to access serial data from specific registers. The following methods are available in SMBus2 library for reading serial I2C data from slave devices:
read_byte(i2c_addr,force=None) – To read a single byte from a device.
read_byte_data(i2c_addr,register,force=None) – To read a single byte from a designated register.
read_block_data(i2c_addr,register,force=None) – To read a block of up to 32-bytes from a given register.
read_i2c_block_data(i2c_addr,register,length,force=None) – To read a block of byte data from a given register.
read_word_data(i2c_addr,register,force=None) – To read a single word (2 bytes) from a given register.
Similarly, data can be written to I2C slaves in bytes, words or block of bytes. In some I2C slave devices, data must be written to specific registers. The following methods are available in SMBus2 library for writing serial I2C data from slave devices:
write_byte(i2c_addr,value,force=None) – To write a single byte to a device.
write_byte_data(i2c_addr,register,value,force=None) – To write a byte to a given register.
write_block_data(i2c_addr,register,data,force=None) – To write a block of byte data to a given register.
write_i2c_block_data(i2c_addr,register,data,force=None) – To write a block of byte data to a given register.
write_word_data(i2c_addr,register,value,force=None) – To write a byte to a given register.
write_quick(i2c_addr,force=None) – To perform quick transaction. Throws IOError if unsuccessful.
The following methods are available for managing SMBus processes and to combine I2C bus read/write operations:
process_call(i2c_addr,register,value,force=None) – To execute a SMBus Process Call, sending a 16-bit value and receiving a 16-bit response
block_process_call(i2c_addr,register,data,force=None) – To send a variable-size data block and receiving another variable-size response.
i2c_rdwr(*i2c_msgs) – To combine a series of i2c read and write operations in a single transaction.
In the next tutorial, we will discuss interfacing the ADXL345 accelerometer sensor with Raspberry Pi via I2C port.
Filed Under: Featured Contributions, Raspberry pi
Questions related to this article?
👉Ask and discuss on Electro-Tech-Online.com and EDAboard.com forums.
Tell Us What You Think!!
You must be logged in to post a comment.