Weighing scales are frequently used to measure the weight of goods, such as bulk items and raw materials. We sometimes use them at grocery stores to weigh produce or at home to measure our weight.
Building a weighing scale is no simple task. It involves a combination of load cells, amplifier circuits, and microcontrollers or analog-to-digital converters (ADCs). The challenge lies in the calibration, ensuring an accurate scale.
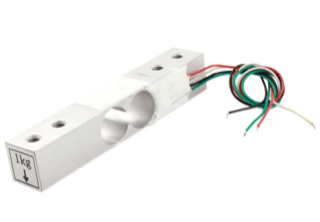
In this project, we’ll build a single load cell scale using a 1-kg load cell, Arduino, and the HX711 amplifier module. This scale can measure a maximum of 1 kg.
After proper calibration, the scale built in this project worked perfectly, providing the same results as a commercial kitchen scale.
Components required
- Arduino UNO/Mega x1
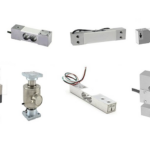
- 1-kg load cell x1
- HX711 amplifier module x1
- Push button x1
- Resistor 330Ω x1
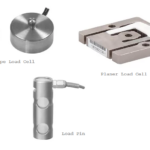
- Load cell kit x1
- SSD1306 x1
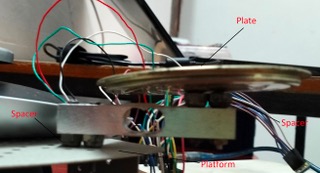
If you do not have a load cell kit, you’ll need to 3D print or build a platform, a plate, and spacers to assemble the load cell into a weighing scale. We’ve used a robot chassis as the platform and a metal cover as the plate. Extra-size bolts are used as spacers.
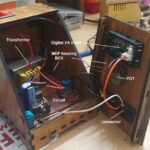
Assembling the weighing scale
The first thing to do is assemble the weighing scale. If you have a load cell kit that comes with a platform, plate, spacers, screws, and bolts, your job will be easy. The load cell works by deformation in its strain gauge network.
One side of the load cell must be fastened to the fixed platform, and the other side must be fastened to the plate. The spacers are required between the load cell and the platform, as well as the load cell and the plate, to ensure the load cell has enough space to deform when a weight is put on it.
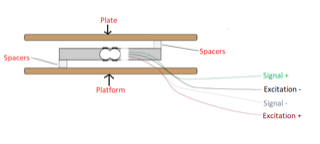
We’ve used a robot chassis as the platform and a metal cover as the plate. Extra-size bolts are used as spacers.
Calibration
After properly assembling the load cell to the platform and plate, it’s time to calibrate it. To do so, find the calibration constant for your load cell. Each load cell outputs its own calibration constant depending upon its design and assembly in the weighing machine. So, it’s necessary to determine its calibration constant.
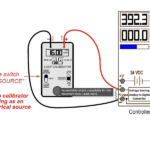
Calibration circuit connections
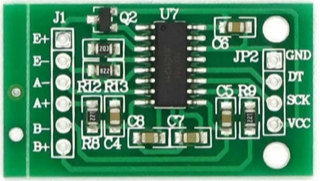
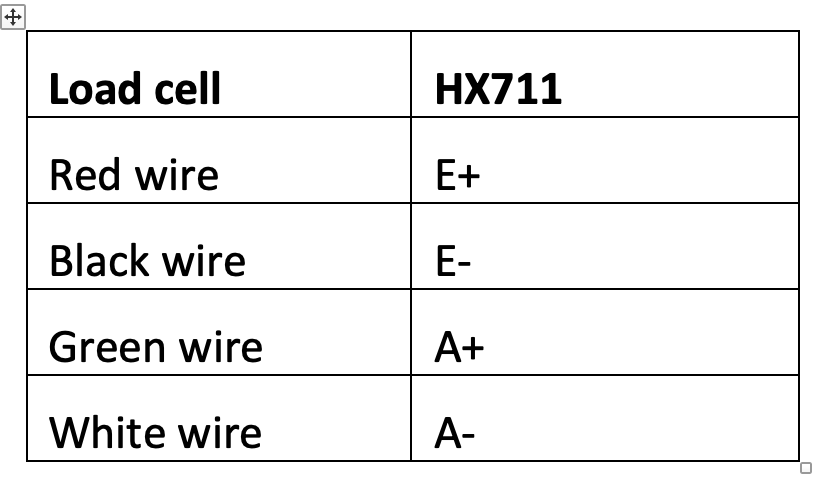
To find the calibration constant, interface the load cell with the HX711 amplifier module and interface the amplifier module with the Arduino. The load cell has four wires: Excitation + (Red Wire), Excitation – (Black Wire), Signal + (Green Wire), and Signal – (White Wire). The HX711 amplifier module is shown in the image below.
The load module is connected to HX711 according to following table.
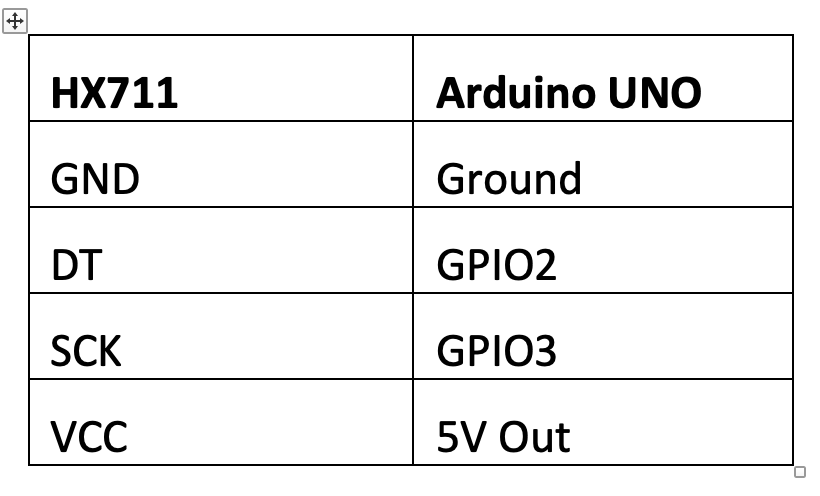
Arduino UNO and HX711 are connected according to following table.
The complete circuit connections for proper calibration:

Arduino sketch for proper calibration
After making the circuit connections for the load cell, HX711, and Arduino, upload the below sketch to Arduino.
#include “HX711.h”
const int HX711_DOUT = 2;
const int HX711_SCK = 3;
HX711 scale;
void setup() {
Serial.begin(115200);
scale.begin(HX711_DOUT, HX711_SCK);
}
void loop() {
if (scale.is_ready()) {
scale.set_scale();
Serial.println(“Taring…”);
Serial.println(“Remove any weights from the scale.”);
delay(5000);
scale.tare();
Serial.println(“Tare done…”);
Serial.print(“Put a known weight on the scale…”);
delay(5000);
long x = scale.get_units(10);
Serial.print(“Result: “);
Serial.println(x);
}
else {
Serial.println(“HX711 Module not found.”);
}
delay(1000);
}
Getting the calibration constant
Open the serial monitor and follow the instructions. At first, ensure the plate is empty to allow Arduino to tare the scale. When prompted, put an item with a known weight on the plate and note the reading.
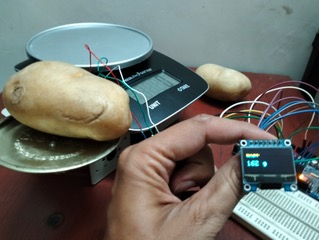
We used a potato that weighed 162 grams on a kitchen scale. The potato readings we received once it was on the plate were 129836, 129827, 129713, and 129734.
To get the calibration constant, divide one of the readings from the known weight. For example, a reading of 129836 divided by 162 grams gives a calibration constant of 801.456. After averaging several readings, we received a calibration constant of 800.
The calibration code
The calibration sketch begins by importing Bogden Necula’s HX711.h library. This library handles communication with the HX711 amplifier module. The variables are defined for the pin connections with the HX711 module, and an object of the HX711 class is instantiated.
In the setup() function, the serial monitor’s debug’s baud rate is set to 115200 bps. The HX711 module is initialized by calling the scale.begin() method.
The loop() function determines if the module is ready by calling the scale.is_ready() method. If it is ready, the scale.set_scale() method is called to set the scale. The user is prompted to remove any weight (the object) on the plate and the scale.tare() method is called to tare the scale. The user is then prompted to put a known weight on the plate. The average of 10 readings (sensed from the HX711) is printed on the serial monitor.
The scale
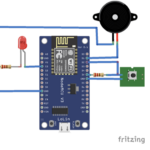
Once you have the calibration constant for the load cell assembly, you can complete the construction of the weighing scale. Let’s add a push button and a display unit to the circuit. The display unit used is SSD1306 0.96” OLED.
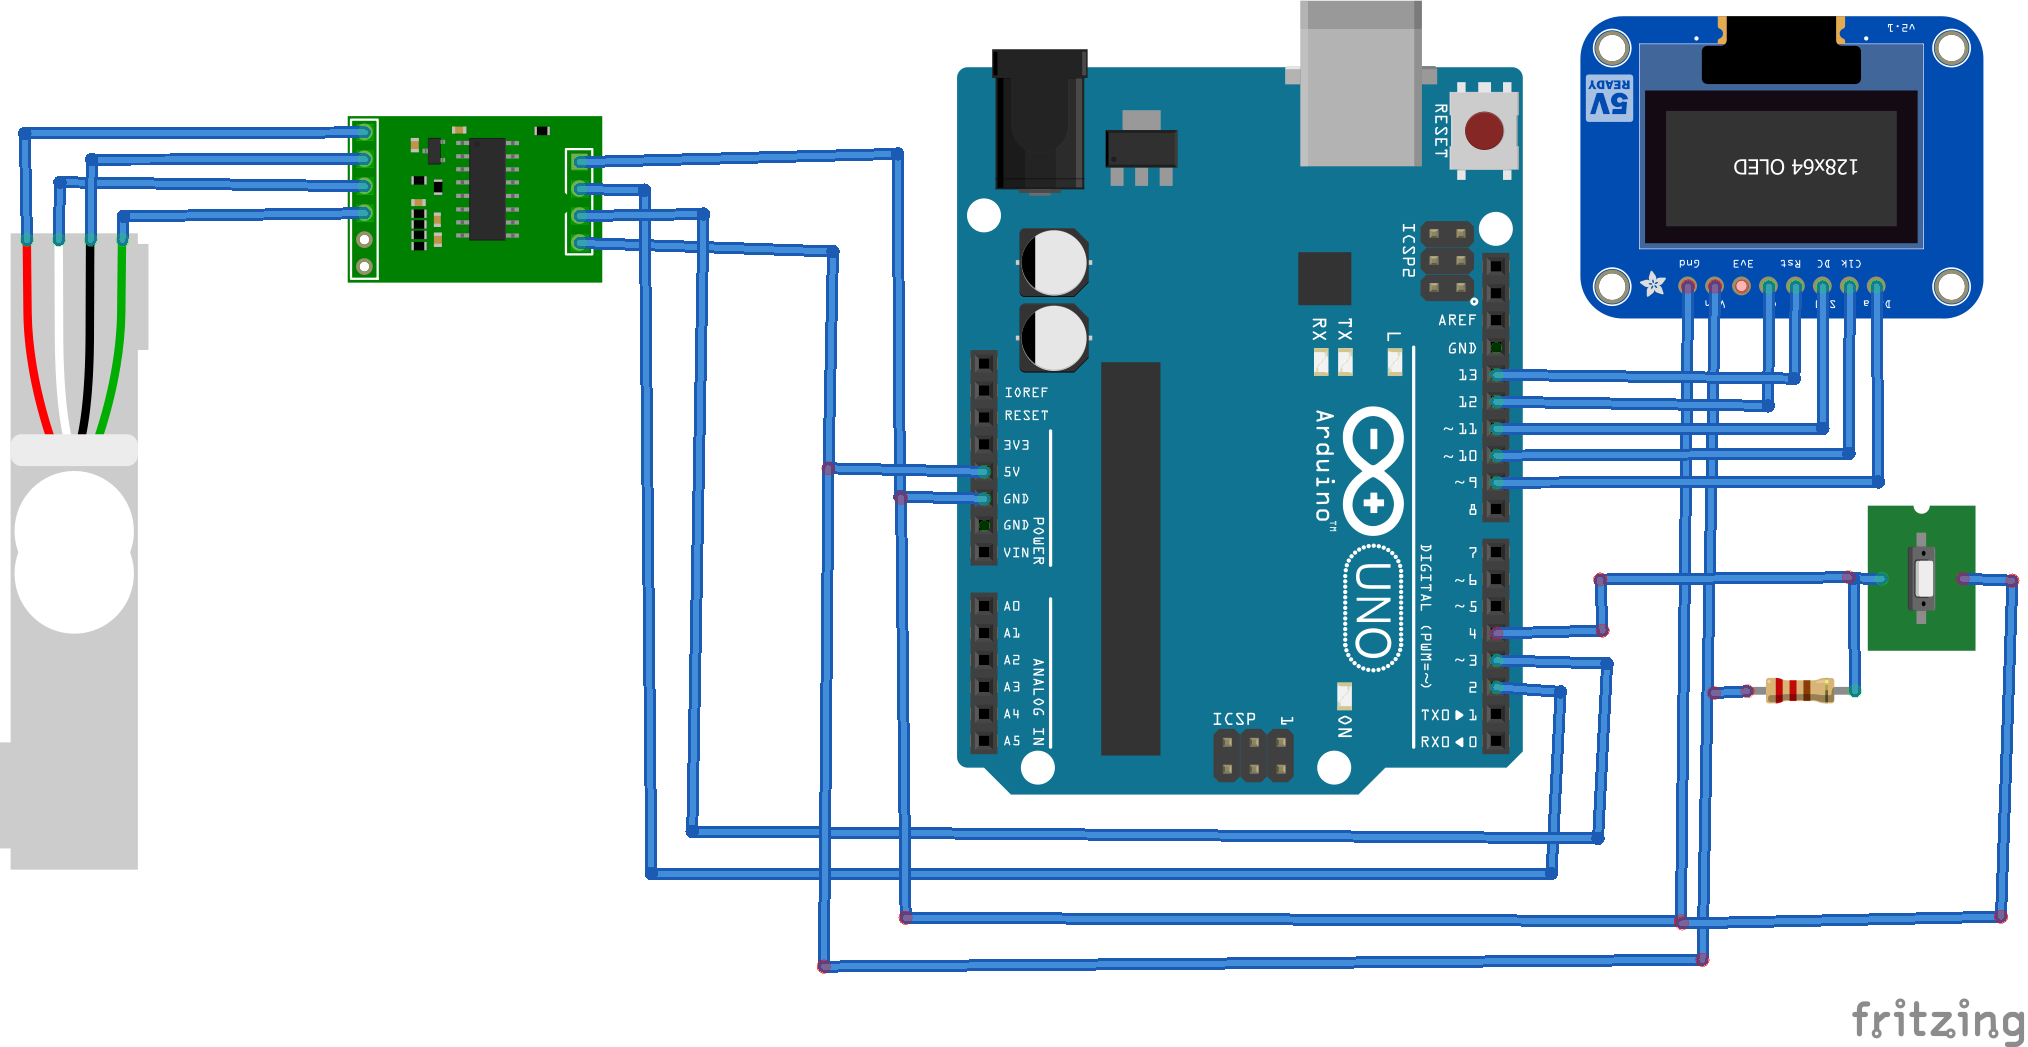
Circuit connections for the scale
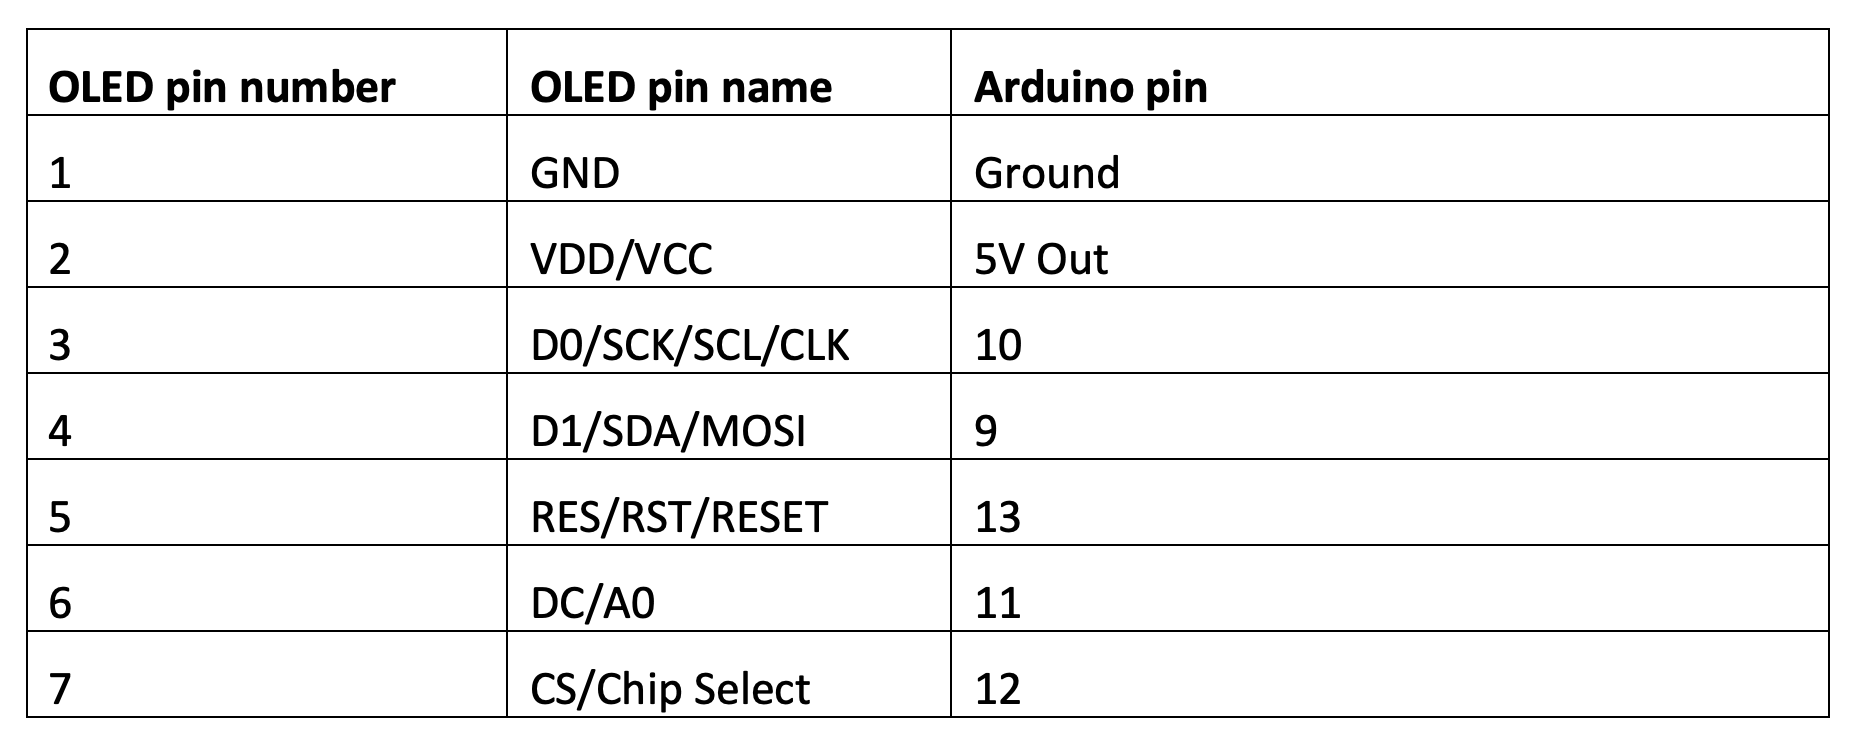
To build the scale, the circuit connections between the load cell and the HX711 and the HX711 and Arduino remain the same. A push button is interfaced at GPIO4 for the tare function. An SSD1306 OLED is interfaced with Arduino UNO, according to the following table.
The complete circuit connections for the weighing scale are shown in the diagram below.
Arduino sketch for the scale
After making the circuit connections, upload the following sketch to Arduino. Remember to replace the calibration constant with the one for your own load cell assembly.
The weighing scale code
The sketch begins by importing the HX711.h, SPI.h, Wire.h, Adafruit_GFX.h, Adafruit_SSD1306.h, and Pushbutton.h libraries.
- The HX711.h library handles communication between Arduino and HX711 amplifier module.
- The SPI.h, Wire.h, Adafruit_GFX.h, and Adafruit_SSD1306.h libraries work with the SSD1306 OLED module.
- The Pushbutton.h library is imported to handle the tare button input.
The variables are defined for pin connections with HX711 module and an object of HX711 class is instantiated. The variables to store the current reading, last reading, and calibration constant are declared. This is followed by declaration of variables for pin connections with the SSD1306 OLED and instantiation of an object of the Adafruit_SSD1306 class. The variable for pin connection with push button is defined and an object of the Pushbutton class is instantiated.
In the setup() function, the serial monitor’s serial debug baud rate is set to 115200 bps. The display is initialized and cleared. The HX711 module is initialized, scaled, and tared. The user-defined function ShowWeight() is defined to display the current reading on the OLED screen.
In the loop() function, the status of the tare button is checked. If it’s pressed, the scale is tared. The current reading of the weight is taken by calling the scale.get_units() method. The reading is compared with the last reading. If it differs from the last one, the OLED display is updated by calling the ShowWeight() function to display the updated weight measurement.
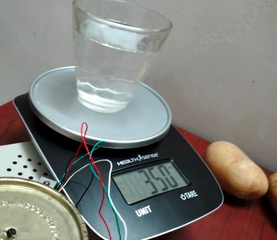
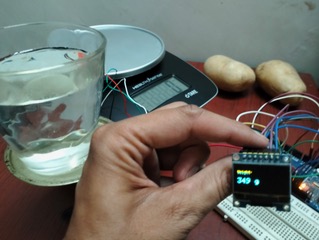
Results
The measurements made by our digital weighing scale are compared with measurements made by a commercial kitchen weighing scale. The following images illustrate the accuracy of the weighing scale that we constructed.
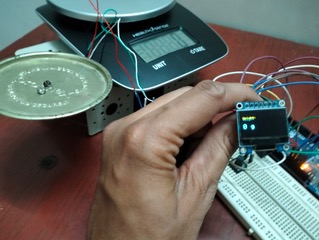
Take a look at our Arduino-based digital weighing scale in action.
You may also like:
Filed Under: Arduino Projects, Electronic Projects
Questions related to this article?
👉Ask and discuss on Electro-Tech-Online.com and EDAboard.com forums.
Tell Us What You Think!!
You must be logged in to post a comment.